

How to Protect Your Travel Food from Heat, Moisture and Bugs
You packed rice, oats, nuts and snacks. You were proud of your food plan.
Then day four arrives. The oats smell damp. Ants are marching into your snack bag. The crackers have gone soft in the heat.
It happens to almost every traveler at some point. Heat, moisture and bugs are the three big enemies of travel food. The good news is you can beat all three with a few simple habits.
This guide shows you how to keep your food fresh, safe and tasty, whether you are on a road trip, a trek, a long overland journey, or a trip somewhere remote.
Table of contents
Why Travel Food Goes Bad So Fast
At home, your food sits in a cool, dry cupboard. On the road, everything changes.
- Heat makes food spoil faster.
- Moisture from rain, sweat, humid air and condensation sneaks into packages.
- Bugs and animals are drawn to food smells.
- Rough handling crushes bags and breaks seals.
A bag that works fine in your kitchen can fail in a hot bus, a damp tent or a sweaty backpack. So you need a plan.
Enemy #1: Heat
Heat is the sneakiest problem. You may not notice it until the food is already ruined.
What heat does to food
- Fats and oils turn bad (this is called going rancid), so nuts, oils and nut butters spoil faster.
- Chocolate melts and snacks turn soft.
- Fresh and cooked foods grow germs quickly.
- Packaging can swell, leak or split.
The US food safety agency (USDA) says perishable food should not sit out for more than two hours. In hot weather above 90°F (32°C), the limit drops to one hour. So keep this in mind when you stop for a picnic on a hot day.
How to beat the heat
- Pick heat-friendly foods. Choose dry, shelf-stable foods like rice, pasta, oats, dried beans, jerky, dried fruit and crackers. Skip foods that spoil easily when you will have no fridge.
- Keep food out of the sun. Do not leave food on a dashboard, on a roof rack or in a closed car. The inside of a parked car can get much hotter than the air outside.
- Use insulation. Wrap food in a spare T-shirt or put it in the middle of your pack, not on the outside.
- Pack smart in your bag. Put your food deep inside your backpack, near your back, where it stays cooler than the top or sides.
- Use a cooler only for what needs it. Cold packs help for a day or two. For longer trips, rely on foods that do not need cooling.
Enemy #2: Moisture
Moisture is the silent killer of dry food. Even a little bit can cause mold, clumping and a bad smell.
Where moisture comes from
- Rain and wet gear
- Humid air in tropical places
- Condensation inside tents and vehicles
- Sweat from your body and backpack
- Wet hands or utensils dipped into food bags
Think about rice, flour, oats, sugar and salt. They all soak up water from the air. In a humid place like Thailand or the Amazon, they can turn damp in days.
How to keep food dry
- Seal food tightly. Use airtight bags and containers instead of the flimsy packaging food comes in.
- Double bag key foods. One bag can fail. Two bags give you a backup.
- Use a waterproof outer layer. A dry bag or a simple rain cover protects your food from storms and river crossings.
- Repack at home. Remove bulky boxes. They absorb moisture and take up too much room.
- Never put wet items near your food. Keep wet socks, towels and bottles in a separate spot.
- Open less, scoop clean. Use a dry spoon every time. Wet utensils bring water into the bag.
Why Mylar bags are great for dry travel food
Regular plastic bags let a small amount of air and moisture pass through over time. They also let light in. A mylar bag is different. It is thick and layered, so it blocks air, light and moisture much better.
That is why many campers, preppers and long-trip adventurers use them to repack dry foods such as rice, oats, beans, pasta and trail mix. You can find a range of sizes at royloglobe.com/collections/mylar-bags.
Here is how to use one:
- Fill the bag with a dry food. Leave some space at the top.
- Add an oxygen absorber. This small packet soaks up the air left inside the bag.
- Press out the extra air and seal the top with a heat sealer or a clothes iron.
- Label it with the food and the date.
- Place it inside your pack or a hard container for extra protection.
Important safety notes:
- Mylar bags with oxygen absorbers are for dry foods only. Do not seal wet or moist foods this way.
- Foods high in oil, like nuts and brown rice, do not last as long. Use them within a shorter time.
- A mylar bag is not rodent-proof. A hungry animal can chew through it.
Enemy #3: Bugs and Animals
Bugs find food fast. Ants can march in overnight. Weevils and moths can hide in a flour bag or a rice sack. In hot, humid places, the problem gets worse.
Common food pests on the road
- Ants, which find even tiny crumbs
- Weevils and pantry moths, which can live in grains, flour and cereal
- Cockroaches, especially in hostels, huts and street-side lodgings
- Mice and rats, which can chew through bags and cardboard
- Wildlife, like monkeys, birds and bears, depending on where you travel
How to keep bugs out
- Check food before you buy. Look for holes, webbing or tiny moving specks in bags of rice, flour and cereal.
- Repack in airtight bags or containers. If a bug can’t get in, it can’t eat.
- Keep food off the ground. Hang it, put it on a shelf or keep it inside your vehicle if that is safe.
- Clean up crumbs right away. Wipe tables, bags and your cooking area after each meal.
- Do not keep food in your sleeping area if there are animals in the area.
- Use hard containers for animals. In bear country, follow local rules and use approved bear-proof canisters or food lockers.
- Avoid strong-smelling food in the open. Seal it up tightly.
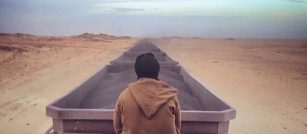
Adventurers going to remote places face this all the time. Trips like riding the iron ore train across the Sahara in Mauritania mean you may be far from shops for days, so good food storage is part of your safety plan.
Match Your Storage to Your Trip
Different trips have different food problems. Here is a quick guide.
| Trip Type | Main Problem | Best Tip |
| Road trip | Heat in the car | Keep food out of direct sun and pack shelf-stable foods |
| Tropical travel | High humidity | Repack dry food in airtight, moisture-blocking bags |
| Desert trip | Extreme heat | Insulate food and avoid foods that melt or go rancid |
| Trekking | Weight and moisture | Repack into light bags and use a dry bag |
| Remote expedition | No shops, long gaps | Pack extra, seal well and plan every meal |
| Campsite / camping | Bugs and animals | Use sealed containers and store food away from your tent |
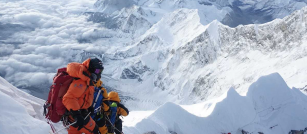
Big challenges make good planning even more important. Think of endurance events like the Marathon des Sables, where racers need to carry what they eat, or long expeditions such as climbing Mount Vinson in Antarctica and rowing across the Atlantic Ocean. When you cannot pop into a shop, your food has to survive the whole trip.
What to Pack | Best Foods for Hot, Humid or Remote Travel
Pick foods that last, weigh little and need no fridge.
Great choices
- Rice, couscous and instant noodles
- Rolled oats and instant porridge
- Dried beans and lentils (or pre-cooked pouches)
- Pasta
- Jerky and dried meat
- Dried fruit and trail mix
- Powdered milk and instant soup
- Crackers and energy bars
- Tea, coffee and drink mixes
Foods to watch
- Chocolate and soft candy (they melt)
- Nuts and nut butters (they can go rancid in the heat)
- Fresh fruit and veggies (they spoil fast)
- Cheese, eggs and cooked meals (they need cooling)
Don’t Forget Water
Food storage and water safety go hand in hand.
- Carry enough clean water, or a filter or purification tablets.
- Wash your hands before you handle food.
- Keep your cooking pot and bowl clean.
- Never use dirty water to clean your dishes.
For more on staying safe far from home, check out the travel tips section and the travel resources page.
Final Thoughts
Great trips start with good planning, and food is a big part of that. If you protect your food from heat, moisture and bugs, you save money, stay healthy and avoid stress.
Start simple. Pick foods that last, seal them well and keep them cool, dry and out of reach of pests. A few smart habits can make the difference between a great meal and a sad, soggy one.
Planning a bigger adventure? Browse more ideas in the travel tips category or see what trips are coming up on the Join a Trip page.
Remember, never travel without travel insurance! And never overpay for travel insurance!
I use HeyMondo. You get INSTANT quotes. Super cheap, they actually pay out, AND they cover almost everywhere, where most insurance companies don't (even places like Central African Republic etc!). You can sign-up here. PS You even get 5% off if you use MY LINK! You can even sign up if you're already overseas and traveling, pretty cool.
Also, if you want to start a blog...I CAN HELP YOU!
Also, if you want to start a blog, and start to change your life, I'd love to help you! Email me on johnny@onestep4ward.com. In the meantime, check out my super easy blog post on how to start a travel blog in under 30 minutes, here! And if you just want to get cracking, use BlueHost at a discount, through me.
Also, (if you're like me, and awful with tech-stuff) email me and my team can get a blog up and running for you, designed and everything, for $699 - email johnny@onestep4ward.com to get started.
Do you work remotely? Are you a digital nomad/blogger etc? You need to be insured too.
I use SafetyWing for my digital nomad insurance. It covers me while I live overseas. It's just $10 a week, and it's amazing! No upfront fees, you just pay week by week, and you can sign up just for a week if you want, then switch it off and on whenever. You can read my review here, and you can sign-up here!







 As you know, blogging changed my life. I left Ireland broke, with no plan, with just a one-way ticket to Thailand
and no money. Since then, I started a blog, then a digital media company, I've made
more than $1,500,000 USD, bought 4 properties and visited (almost) every country in the world. And I did it all from my laptop as I
travel the world and live my dream. I talk about how I did it, and how you can do it too, in my COMPLETELY FREE
Ebook, all 20,000
words or so. Just finish the process by putting in your email below and I'll mail it right out to you immediately. No spam ever too, I promise!