How to Climb Mount Elbrus in Russia; Step by Step Guide & My Experience
Here is everything you need to know about how to climb Mount Elbrus in Russia, so let me help you guys organise it cheaply and safely. I should add that I’m not an expert mountaineer, but I am trying to become the first person to visit every country in the world (done!), the North Pole (I ran the North Pole Marathon), South Pole and climb the 7 Summits, the highest mountain on each of the 7 continents, (4/7 done). I successfully summited Mount Elbrus, at 5,642m, is Europe‘s highest mountain, last year in Russia and it was an amazing experience.
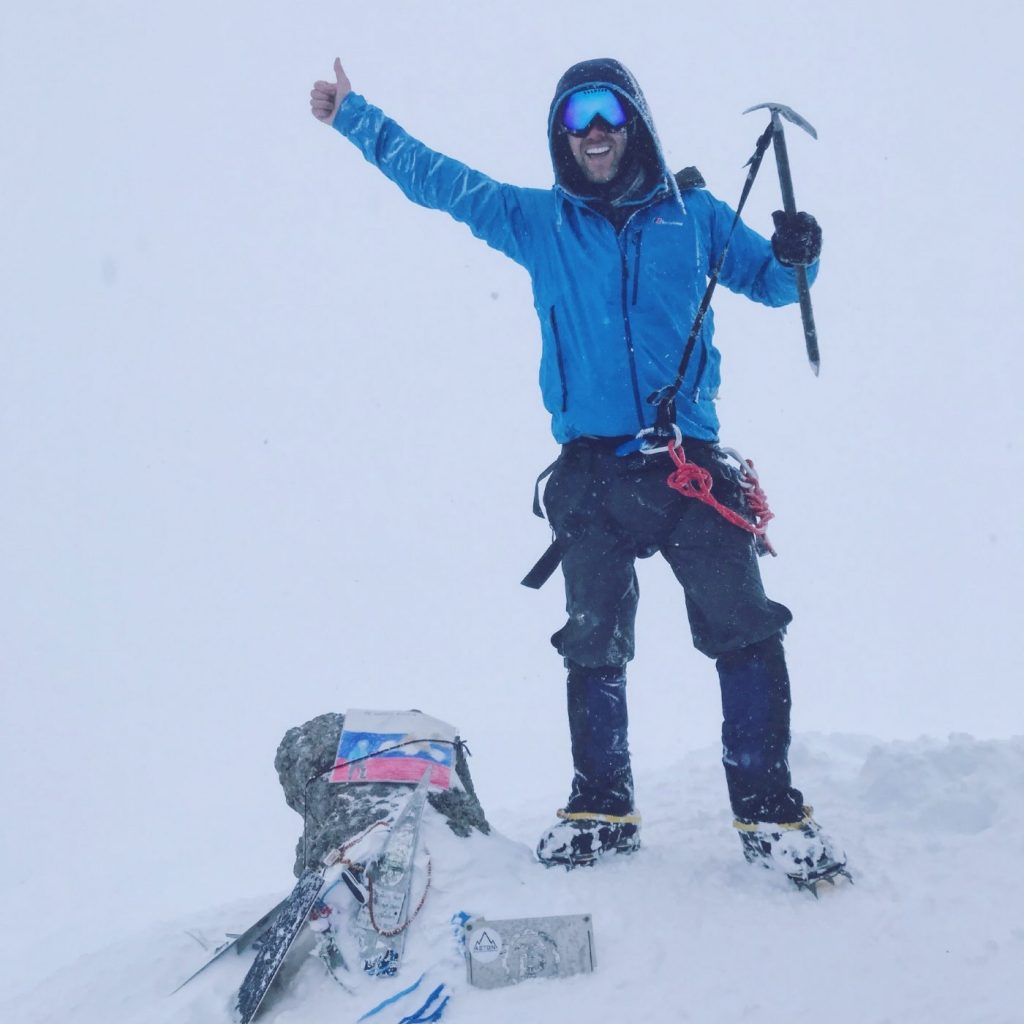
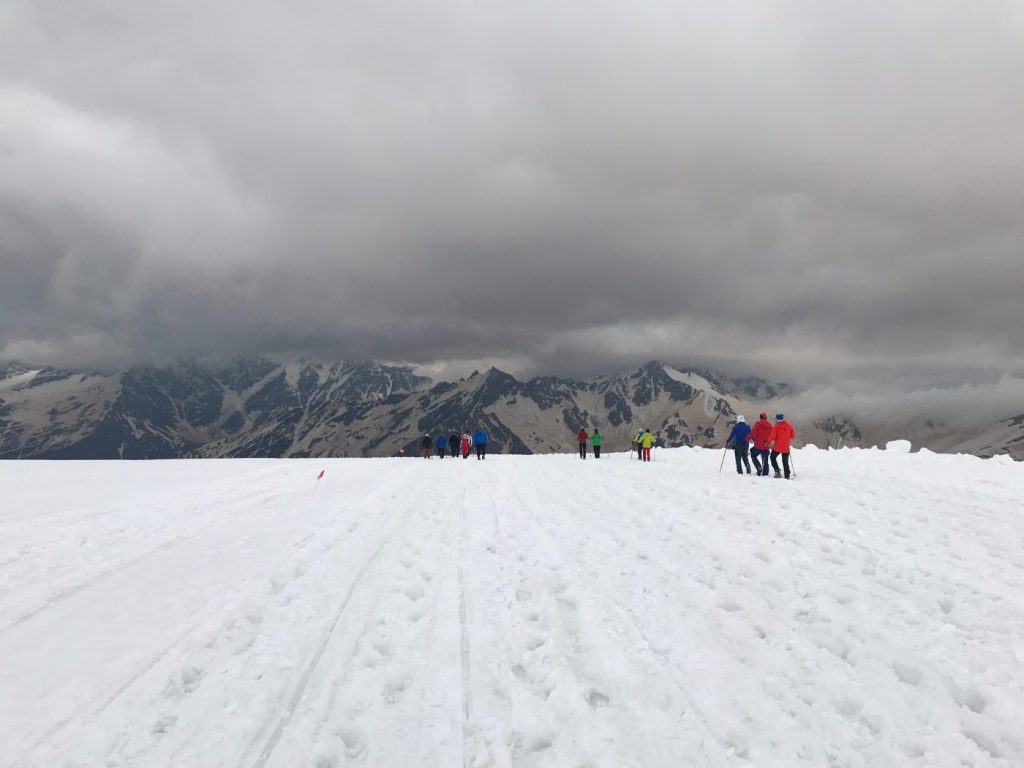
Mount Elbrus is a relatively ‘easy’ mountain to climb, with no technical experience necessary. But that doesn’t mean it’s a walk in the park, so please be aware! Although it’s slightly lower than Kilimanjaro, Africa’s highest mountain which I climbed a few years ago, it’s a much more strenuous climb. People die on Elbrus each year from being underprepared, undertrained, and from freezing to death if they climb without a guide and the weather turns, as it did on my climb – you can see the white-out at the summit on the photo below!
I hope my guide helps you guys climb Mt Elbrus, either independently or with a tour operator.
Table of contents
- How to Climb Mount Elbrus in Russia; Step by Step Guide & My Experience
- 5 THINGS TO KNOW ABOUT MOUNT ELBRUS BEFORE YOU CLIMB:
- Which route should you climb when climbing Mount Elbrus? North or South route?
- Should You Use A Tour Operator to Climb Mt Elbrus, or Climb Independently?
- How to Climb Mt Elbrus; Step by Step
- RUSSIAN VISA FOR MT ELBRUS:
- GETTING TO NALCHIK AND THEN TERSKOL:
- Climbing Mount Elbrus – North Side & South Side climbing itineraries:
- Mount Elbrus South-side climbing itinerary:
- Climb Mount Elbrus – NORTHSIDE Itinerary :
- MY PERSONAL EXPERIENCE CLIMBING MOUNT ELBRUS (JUNE 2018):
- FAQs on Climbing Mount Elbrus
- How much does it cost to climb Mount Elbrus?
- How high is Mount Elbrus?
- Where is Mount Elbrus?
- What gear do you need for Mount Elbrus?
- How long does it take to climb Mount Elbrus?
- Do You need to be fit to climb Mount Elbrus?
- What’s the success rate for Climbing Mount Elbrus?
- What’s the death rate for Mount Elbrus?
- Do I need a guide to climb Mount Elbrus?
5 THINGS TO KNOW ABOUT MOUNT ELBRUS BEFORE YOU CLIMB:
1) The Best months to climb Mount Elbrus?
June, July, and August. The summer means there is less slow, and the temperatures aren’t AS cold as the rest of the year. Experienced climbers do climb year-round though, although I wouldn’t be capable of that!
2) How much does it cost to climb Mount Elbrus?
$300 and $3000 USD to climb Mount Elbrus, depending on if you do it solo, or with an operator, and which operator you choose.
3) Is Mount Elrbus, or Mont Blanc, Europe’s highest mountain?
Mount Elbrus, at 5,642m, is Europe’s highest mountain. A lot of people incorrectly think Mount Blanc in France, at 4,810m is the highest mountain in Europe but alas, it is not! If you’re interested in climbing Mont Blanc, I did that last year too. (check out the blog post for all you need to know). Most relevant modern authorities define the European continental boundary as the Caucasus watershed, placing Elbrus in Europe due to its position on the north side in Russia.
For your summer climb, on summit night, temperatures can be as low as -20 during the night, so you need proper mountain gear.
4) Elbrus has 2 summits
There are 2 peaks on Mount Elbrus – the East Summit (5621) and the West Summit (5642m), the main (southern) route will take you to the West Summit.
5) Do you need to train, and be fit, to climb Mount Elbrus?
Yes. If you’re someone who does a lot of sport, goes to the gym a couple of times a week, and plays sport at the weekend, then you should probably be capable of climbing Mount Elbrus without specifically training, although I’d still recommend training with a bag on, and going uphill. If you’re out of shape and don’t exercise or hike at altitude regularly, then you absolutely should train for at least a month before attempting to climb Mount Elbrus. It’s a serious mountain and should be respected.
6) Acclimatization when you climb Mt Elbrus:
If you’re not in a rush due to limited holiday time etc, then it’s a good idea to spend a couple of nights in either Terskol (if you’re climbing mount Elbrus from the South route, or in Kislovodsk if you plan to climb Mt Elbrus from the North route). That way you’ll beat the jet lag and begin to acclimatize. You can even take a couple of short hikes to slightly higher altitudes to warm up further.

Which route should you climb when climbing Mount Elbrus? North or South route?
There are 4 routes, North, South, East and West. I’ll assume you guys are like me, and not hard-core experienced climbers, so we can cut out East and West routes as that is only for them!
The 2 main routes are the North and South route. The South route is far and away the most popular route and the one that 95% of people will climb. It starts from Azau village, near Terskol. It’s cheaper, faster (3-5 days), and more developed. You can take cable cars to base camp, and even (if you want to hear) take a snowmobile/snowcat all the way up to 4100m on summit night. Also, the base camp accommodation is much more developed on this side too, even complete with a bar (you have to love Russians!). If you’re going to climb independently, this is an easier, safer choice. Or if you’re climbing with a tour operator (like I did) but don’t have too much experience, this is the best choice too.
The North route is a more pure climbing experience. No cable cars, more basic accommodation and the original route the first climbers used to climb Mt Elbrus. If you’re doing this independently, you would only climb the North route if you have a lot of experience. Or you have hired a guide.
I have included the standard itineraries for both Mount Elbrus South route and Mt Elbrus North route below.
Should You Use A Tour Operator to Climb Mt Elbrus, or Climb Independently?
I used a tour operator for my climb and I believe it was the right choice. I used a Russian operator called ElbrusTours and their prices start at €890, about $1000USD. You can use European or American operators for double the price, which I think is a waste of money because they offer the same service but with slightly nicer websites and food choices! And it’s nicer to support a Russian outfit when climbing a Russian mountain. In fact, I loved them so much, I used them again when I was trekking Aconcagua, South America’s highest mountain, successfully earlier this year! The tour operators can also help with your Russian visa, and with ensuring you have all the right gear and equipment, and of course, if anything goes wrong on the mountain, they’re there to save you.
If you have lots of experience though, it is, of course, cheaper to do it independently. Personally, I wasn’t confident enough to do it solo. And when the operator is $1k, I think it’s money well spent.
How to Climb Mt Elbrus; Step by Step
RUSSIAN VISA FOR MT ELBRUS:
So Mount Elbrus is in Russia, which means first you have to get to Russia. Your first step then is to get a Russian visa. Easier said than done. Generally speaking, most nationalities need to organise a visa in advance, before they come to Russia. And Russia being Russia, you have to do that in your home country. You also need a letter of invitation from a ‘sponsor’ in Russia. Eurgh headache.
My tour operator, Mount Elbrus Tours, organised my invitation for me as part of their package. After a couple of emails back and forth, they issued me with the official Letter of Invitation, I then printed that out and flew to London (I have both Irish and British passports, I used my UK passport for this one). I handed in my Letter of Invitation, filled out the application form, submitted my 2 passport photos, paid the extortionate expedited fee (280GBP ouch – I needed a double entry visa because of onwards trip I had planned, a single entry is fine for you guys!), and 4 days later my passport was back in the embassy, visa printed and stuck in, I was ready for Russia.
GETTING TO NALCHIK AND THEN TERSKOL:
Once you have your Russian visa, getting to Elbrus isn’t so difficult. Ultimately, the hop-off point to start the climb via the most popular ‘South Route’ is the town of Terskol, so that’s your destination (strictly speaking, the town from where the cable cars leave is called Azau village, 5 minutes from Terskol, but Terskol is a bigger town, with mountain equipment rental shops, hotels etc, so it’s better to stay there).
The easiest way is to fly to an airport called Mineralnye Vody, or to an airport called Nalchik, the 2 nearest airports to the mountain. Generally speaking, you’ll fly to Moscow, then connect to Mineralnye Vody or Nalchik for $60 or so. I wanted to be prepped and in good condition for the climb, so I spent a night in Mineralnye Vody (stayed in a quality little place call the Versal Hotel there).
You can also get to Nalchik by long-distance train and bus, all the way from Moscow, or from other major hubs around Russia. I love overland travel, but when you have a mountain to climb, it’s better to get there and get settled and don’t push yourself too much with hardcore travel in advance. So I recommend flying. If you’re climbing Mt Elbrus independently, you have to make your own way to Terskol, from Nalchik or Vody, you can take a bus ($5) or taxi ($40) to Terskol.
If you’re using an operator to climb with, they will generally pick you up in either Mineralnye Vody or Nalchik, and bring you to Terskol where you’ll overnight and get briefed.
Climbing Mount Elbrus – North Side & South Side climbing itineraries:
As I mentioned above, the Northside is more challenging than the south. The south side is used for skiing, so there are cable cars, hotels, quality mountain huts, even a coffee shop and bar at base camp. You can then when on the day of the summit, take a snowmobile up to 4,800m, that combined with the cable car up to 3,800m means you’ll have saved a lot of energy and your chances of summiting are much higher! But many call this cheating, that’s up to you to decide.
The north side has none of the infrastructures, so you’ll be hiking from base camp to high camp, to summit all with no help.
Mount Elbrus South-side climbing itinerary:
Much more popular than the Northside due to how much more developed the infrastructure is, and the fact that your chance to Summit is higher. That being said, it’s often seen as ‘cheating’ on the south side due to the ski lifts and snow-cat, more on that later.
DAY 1:
You get transferred to the town at the foot of Elbrus, Terskol, by your climbing operator, or independently. Sleep at the hotel in Terskol.
DAY 2:
Acclimatisation hike to 3,000m. Sleep at the hotel in Terskol once more.
DAY 3:
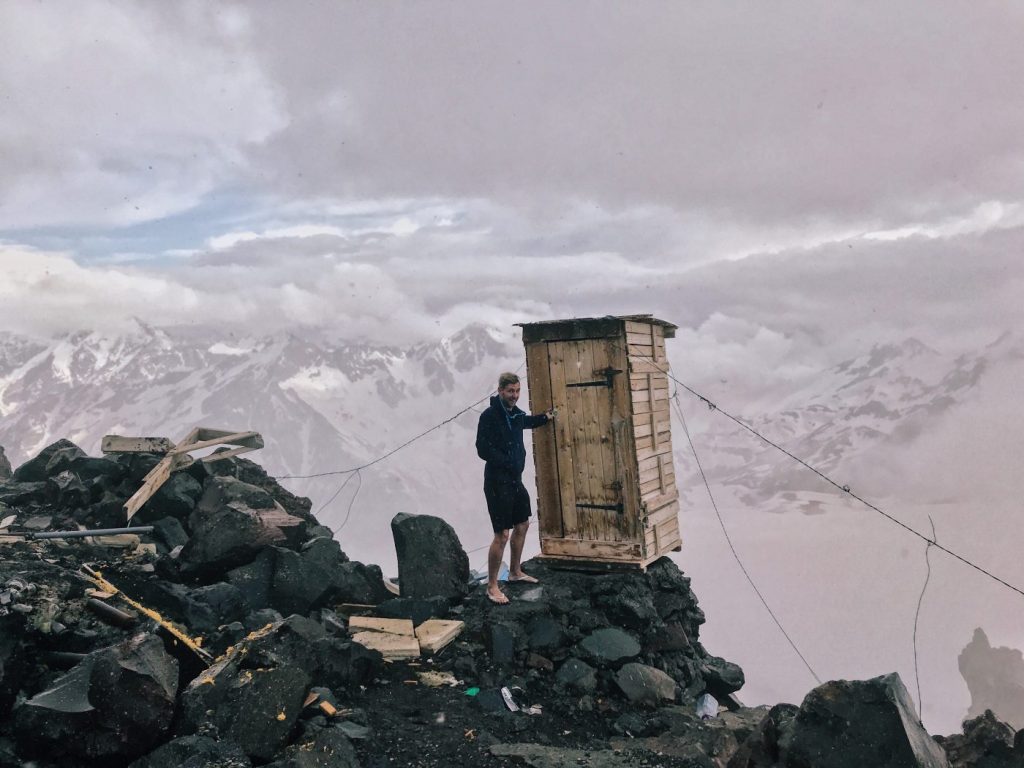
Take the cable car up to 3800m, move to your mountain hut (if you use the same company as me, the mountain hut is gorgeous, restaurant, bar with draft beer etc, but no shower, and outside toilet). Then acclimatisation hike to 4,300m. Sleep in the mountain hut.
DAY4:
Acclimatisation hike to the Pastuckhov rocks, and beyond to 4,800-5,000m. Sleep in the mountain hut.
DAY 5:
Acclimatization day. Some learning of techniques, ropes, crampons, ice axe etc. Quite a relaxed day. Sleep in the mountain hut.
DAY 6:
SUMMIT DAY! If you take the snowcat (a huge snowmobile) you leave the hut at 3am, it drives you to around 4,800m then you hike to the summit at 5,642. To the summit and back is normally around 10 hours, so you should be up and down by 1 pm.
If you don’t want to take the snowcat, it’s the same schedule but you leave the mountain hut and start your summit attempt at around midnight, and hike yourself to 4,800m. That’s one for the purists! After the summit, you’ll either sleep one last time in the mountain hut or if everyone is fast and back before 3pm, take the cable car down and sleep in the hotel.
DAY 7:
Reserve day. A spare day in case of bad weather so you can have another crack at hitting the summit. Sleep in the hotel (or mountain hut if there was bad weather)
DAY 8:
Departure. I went on a mad adventure to South Ossetia after this.

Climb Mount Elbrus – NORTHSIDE Itinerary :
If you want to climb Mt. Elbrus from the north route, the first town is Kislovodsk. The distance between Mineralnye Vody and Kislovodsk is 50 km (it’s included in your climb price if you book with an operator)
1ST DAY: Transfer to Kislovodsk town, sleep in hotel there.
2ND DAY: Drive to basecamp (2500 m), then short acclimatization walk. Sleep in the base camp hut
3RD DAY: Acclimatization hike up to 3100 m. Sleep in the base camp hut
4TH DAY: Hike and carry gear to 3800 m high camp. Head back to basecamp and sleep at base camp.
5TH DAY: Hike to high camp, sleep there.
6TH DAY: Acclimatization hike to the Lenz Rocks (4800 m), back to sleep at high camp.
7TH DAY: Acclimatization day, sleep at high camp.
8TH DAY: SUMMIT DAY! In the middle of the night, start the hike from 3,800 to 5,642m. After enjoying the summit and its impressive views of the Caucasus mountain range, descend back to High Camp.
9TH DAY: High camp to base camp. This is also a reserve day in case of bad conditions, giving you a one-day buffer to summit.
10TH DAY: Either departure or a night in Kislovodsk. It’s a gorgeous spa town, highly recommend. Chill, drink beer, celebrate!
MY PERSONAL EXPERIENCE CLIMBING MOUNT ELBRUS (JUNE 2018):
I had no idea about the South Side/North Side at all. I had been in contact with Sergei, the owner of ElbrusTours, his team had helped me so much with my visa and now I was good to go. All I told him was that I had wanted the best experience possible, so this was what we worked out.
I arrived in Mineralyne Vody with (Anthony from ManVsClock) and we spent a couple of days there catching up with some blogging and business. Soon we meet the Elbrus Tour guys who told us our itinerary. We would drive to the North Side, hike to the base camp, spend a night there, next day we’d hike to high camp on the north side, and come back down to base camp. From there, we’d transfer to base camp on the South Side, in case we weren’t strong enough for the hike without the snowcat on the north side.
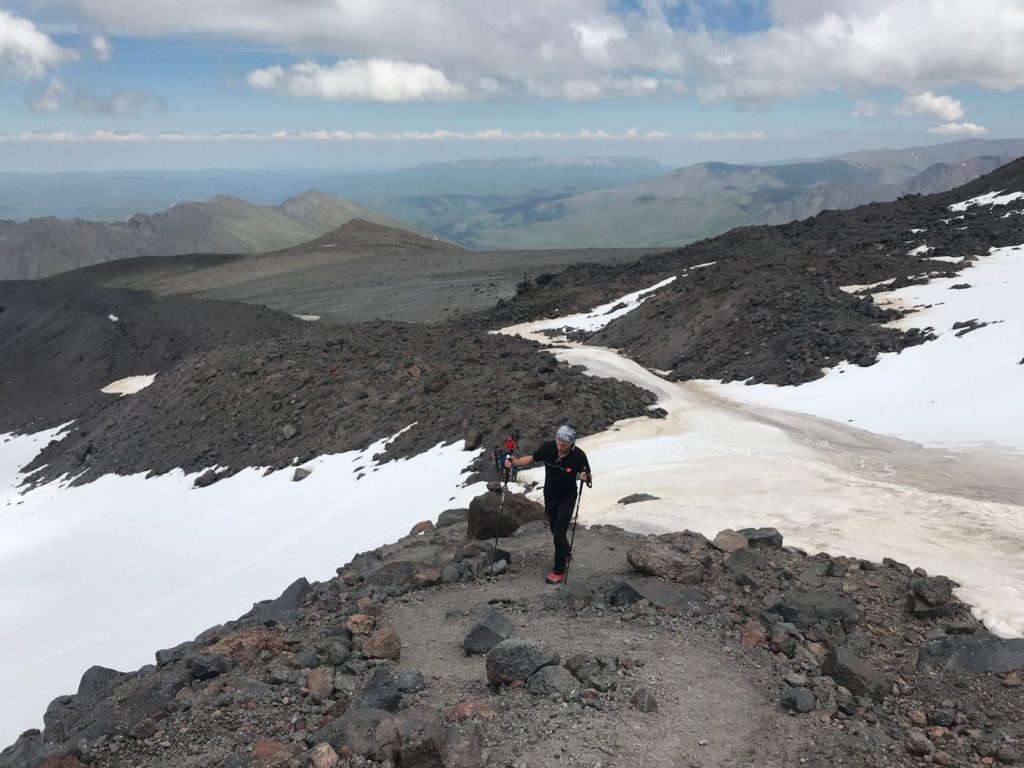
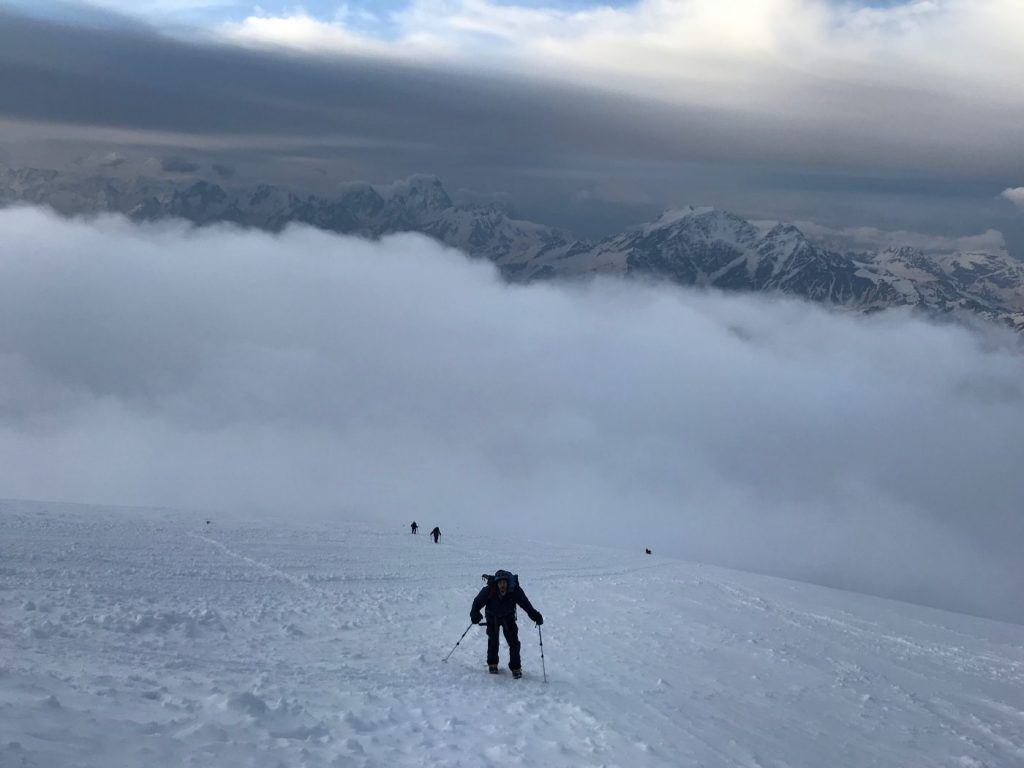
This wasn’t a standard itinerary, but I wanted to see the beauty of the North Side and it was well worth it. This was all part of the hike on the North Side:
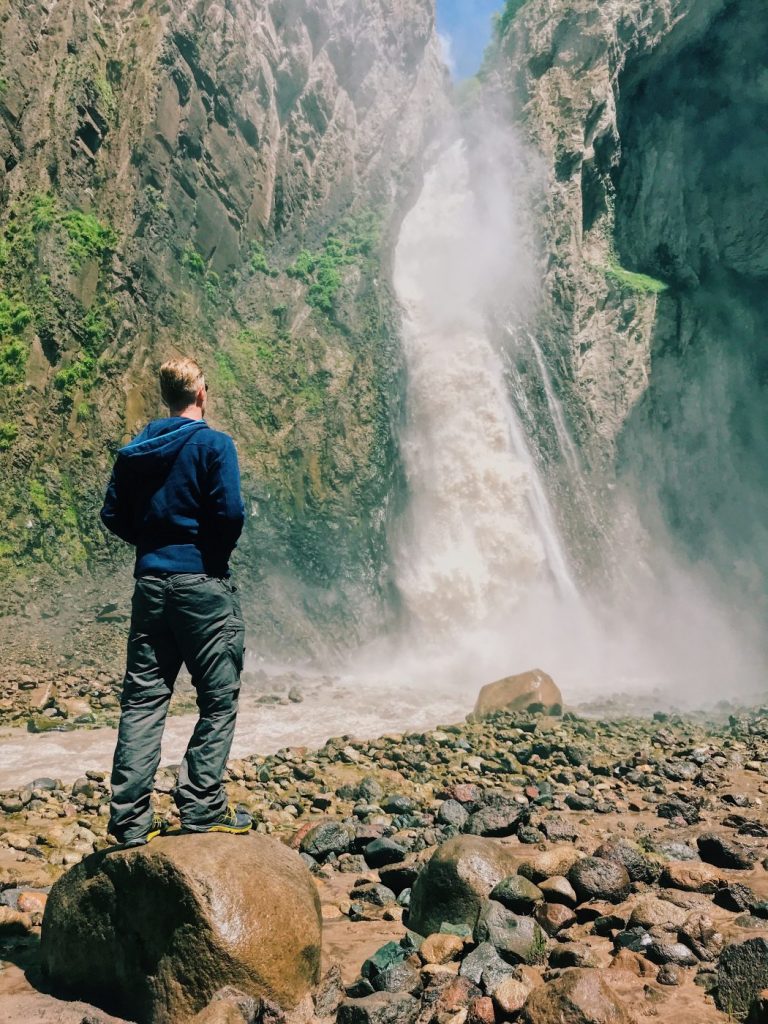
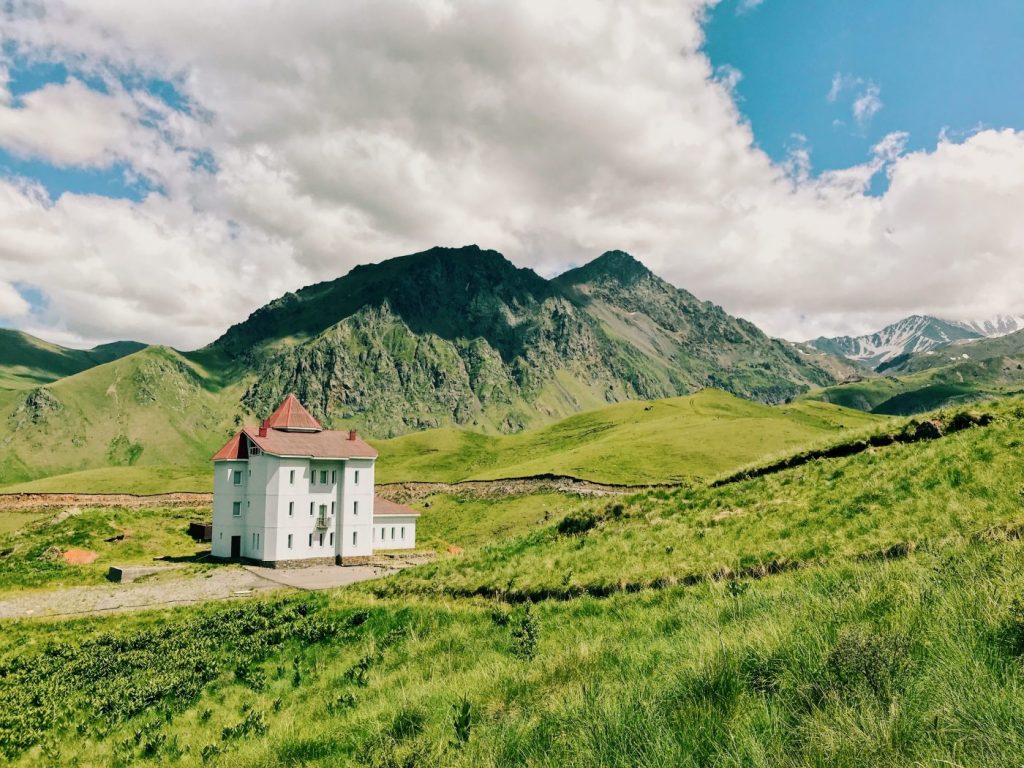
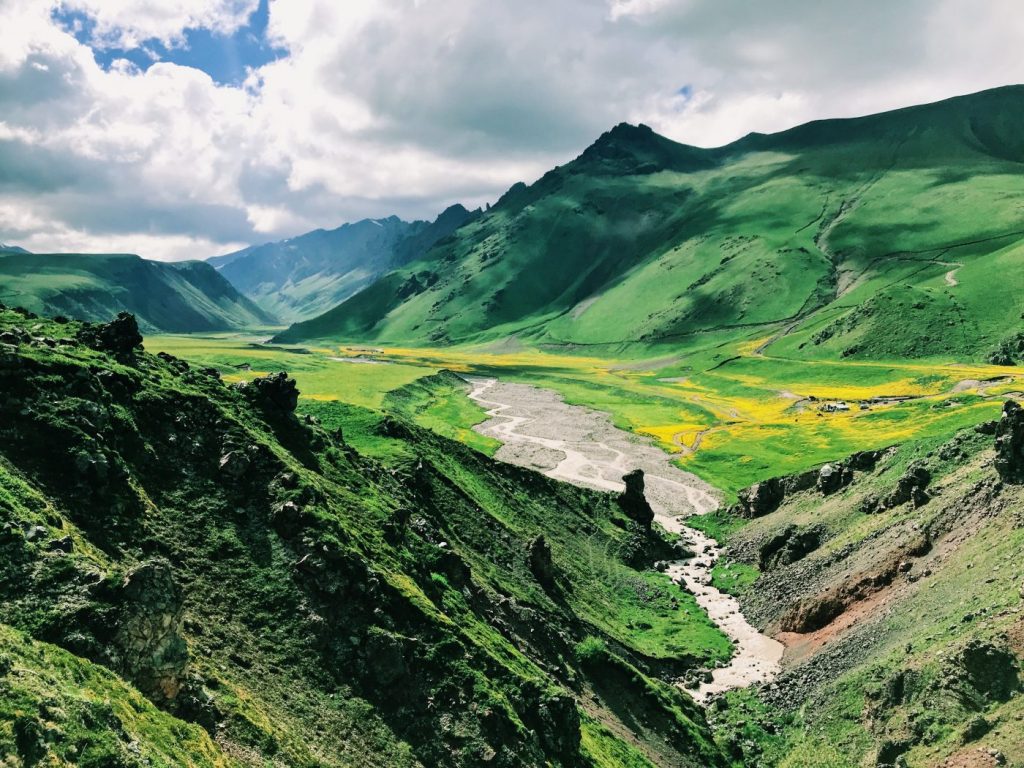
Arriving at North Side Basecamp
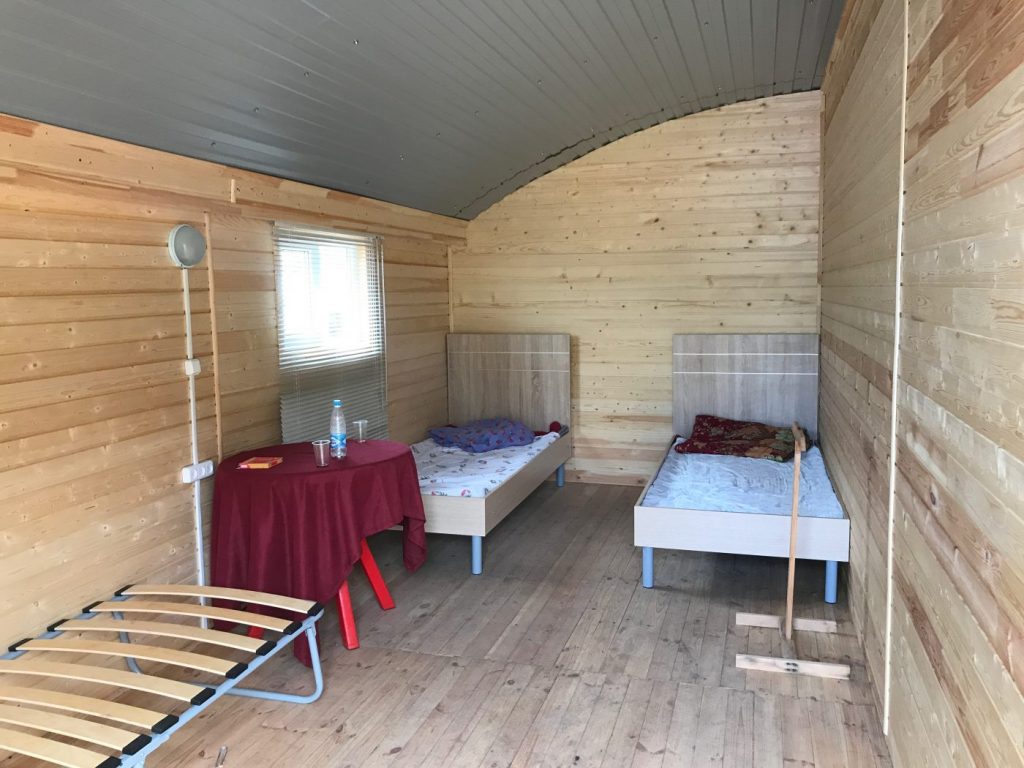
Once we arrived at the Northside basecamp we had the rest of the day to ourselves, we went for a small walk, and came to the dining hall for dinner where they had great veggie options actually.
The following day we hiked to high camp, up to 3,800m. That took us from around 9am until about 3/4pm to get to high camp and back to base camp. Hitting 3,800m certainly felt a lot different from 3,000m too, the air was a lot thinner.
Another night in base camp, and if we were staying to summit from the North Side, we’d then head back to high camp the following day, but we transferred to the Southside basecamp where we had some friends waiting for us.
South Side Base Camp
After a 4 hour drive through the mountains in a 1960s Russian Lada, we arrived in Terskol, took a shower in a proper hotel room and headed straight to bed. The following morning we took the cable cars up to 3,800m where the Southside basecamp was. The base camp was pretty nice. Our group, about 10 of us, all shared a dorm room. No shower, outside bathroom but other than that it was a like a high-end hostel. 3 meals a day, quality food, a nice bar, flat-screen TVs with the football, I was shocked it was so nice! The bathroom though.
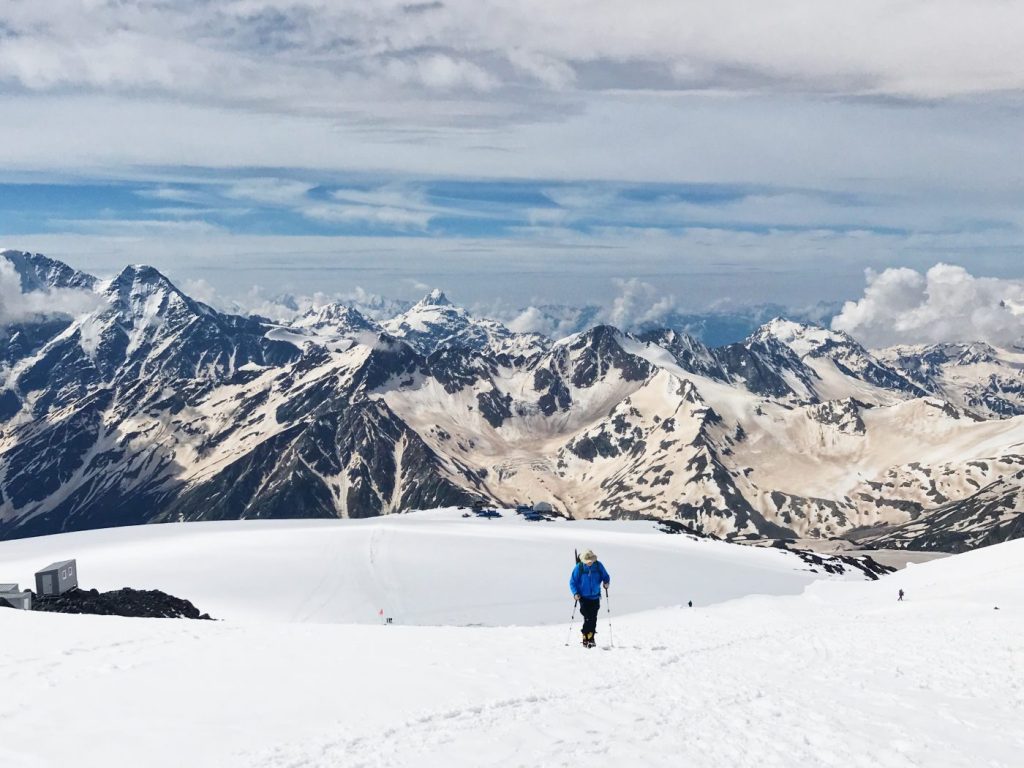
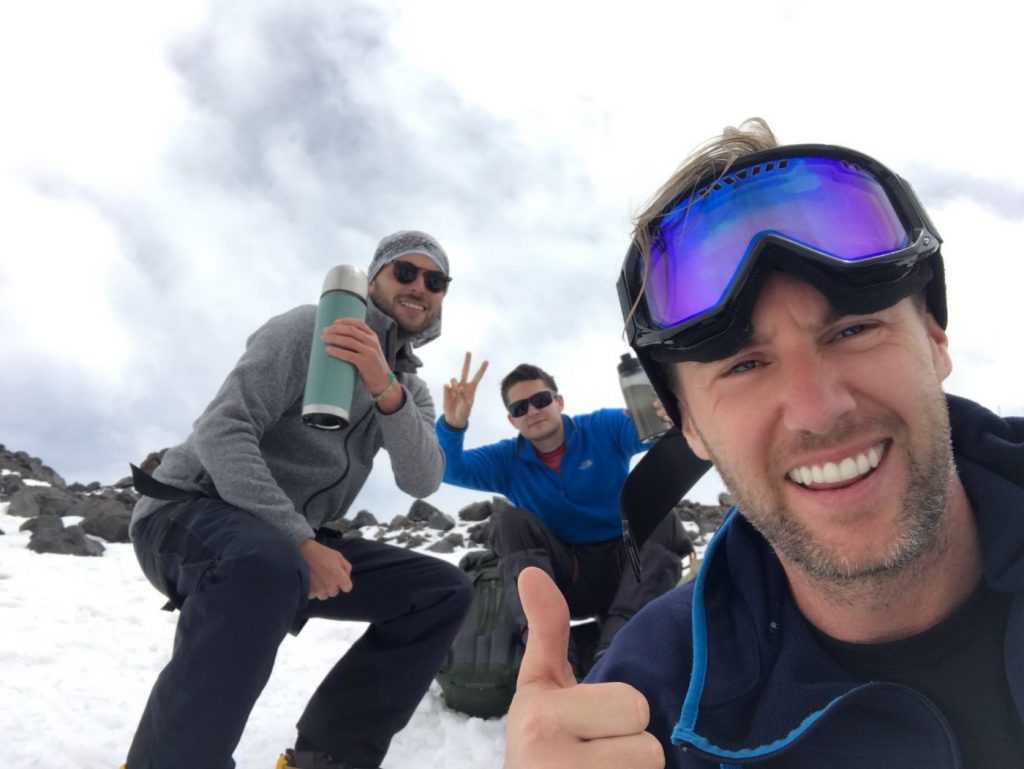
Acclimatisation On the South Side
That day we had some ice axe training and a little hike to around 4,000m. Off to bed, then the following day we had an acclimatisation hike up to 4,800m and that’s when you realise it’s not quite the walk in the park you thought it’d be! Crampons, walking poles, warm weather gear, hiking through snow and ice, suddenly the oxygen feels thin and you feel out of shape. That hike took us most of the day, up to 4,800m and back down again and a few of the group were struggling already.
You don’t have to be in marathon running shape for Elbrus, but if you’re completely out of shape, you’ll fail, simple as that. It has a success rate of around 90% on the South Side, so you should be fine, but equally 25 people a year die on Elbrus, so it’s not to be taken lightly.
We knew we had the following day as a rest day as soon as we could get done. So we could acclimatise further still then. It was tempting to have some of that draft beer but thought it better to respect the climb and stuck to coffee. We spent the day off reading books, doing a bit of blogging (they have 4G on the mountain if you have a Russian Simcard!) and trying to keep the nerves at bay for the summit. It’s beautiful at basecamp though, so a light walk, take a few photos and a couple of coffees and the day is gone. Time for summit day. Also, because we had spent a few days on the North Side, we were slightly more acclimatised than most.

SUMMIT NIGHT
The vast majority of people on South Side will take the snowcat en route to summiting, 99%+ in fact. Normally, if people want to truly climb Elbrus and not use any tech, they’ll take the North side, I didn’t know this of course (no research, as usual) so I was stuck on the Southside but I didn’t want to take the snowmobile. Kindly, Elbrus Tours stepped in and sent us our own guide for Anthony and I to summit with, the rest of the group would take the snowcat with the original guide.
SUMMIT ATTEMPT
So off to bed that night at 8pm, wake up at 11pm. Midnight departure. We wanted to go from Base Camp at 3,800 to 4,800 by around 4am. The hikers arriving by snowcat would be arriving there from there 3.30am departure sometime around then too. So we got into our routine, Viktor our awesome guide, then me, then Anthony. Straight line, walking in unison. I was still quite fit thanks to running the Marathon at the North Pole 2 months previously, Anthony had come in with very little training but he’s a stubborn guy and that pulled him through the morning, much to his credit.
At breakfast time, at 8am or so, we had been hiking 8 hours and had reached 5,200m or so. The air was getting thinner, the steps were getting harder, and we were breathing a little deeper.
The Saddle
We had a few energy snacks in our bag and that helped. The climb from base camp to around 5,200 is pretty consistent in its steepness, but it gets progressively harder as the oxygen levels drop with the altitude. It also gets 1 degree or so colder every 100m too. And of course, you’ve already been hiking for hours and hours. Once you reach 5,200m you have a semi-flat section which you walk around, a couple of km’s, to the saddle.
That’s the low-point between the summit and its sister summit next door. You would think the flat section would feel like a break. But in all honesty, normally you’re quite tired by then and that gentle incline, which takes around 2 hours of hiking, is a killer. Finally, you reach the saddle, and you’re only a few hundred metres of altitude from the top.
By this stage, you have another 1-2 hours to summit, you’ve been going since midnight and it’s around 8am. Altitude sickness will be affecting you, hopefully just a little, but you’ll know it’s there. I had a bit of a headache and Anthony was starting to slur his words a little. One last push.
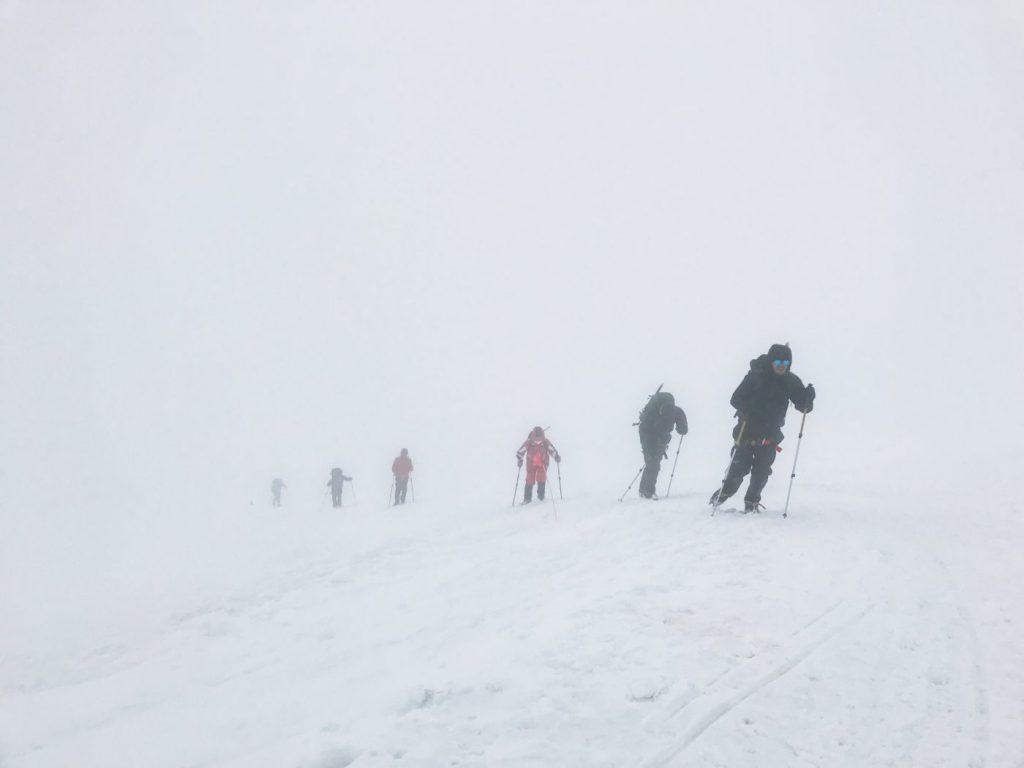
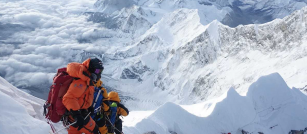
THE WEATHER TURNED BAD
The weather began to turn, and within 20 minutes there was a full-on blizzard. The last hike to the summit is steep, and there are fixed ropes (the kind of ropes that are ‘locked’ to the mountain by guides, and you clip your harness onto them so you can’t fall), so you take a slow pace.
Soon the visibility was about 3m, and we had to rope ourselves together to avoid getting lost. Just one foot in front of another. One step at a time. After the final steep section, it’s a 15-minute flat walk to the summit, we knew we would make it, and even though there was no view, and you could barely see your friends, we made it, we summited Europe’s highest peak.
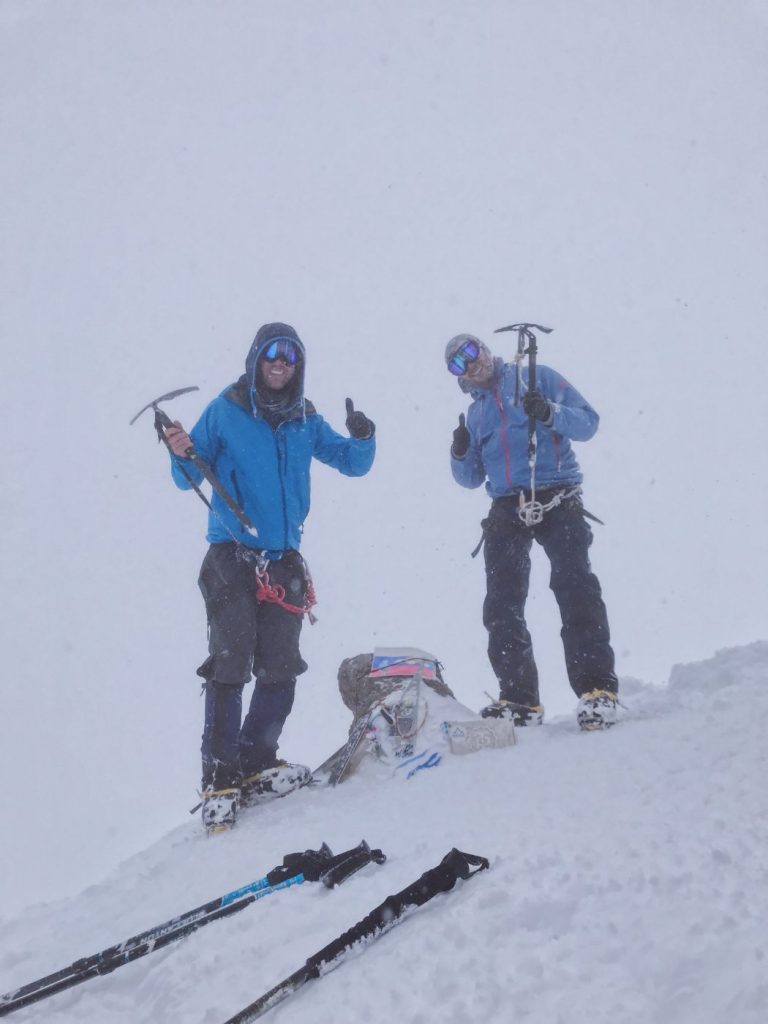
COMING BACK DOWN
Now, all we had to worry about was getting back down the mountain! We finally reached the summit at 10 am, 10 hours of hiking. The actual distance is only 8km, but it’s almost 2km in altitude too. We spent all of about 5 minutes at the summit, but it was cold, visibility was low so off we went, back down. We picked up the pace, dug into our energy reserves. I was spurred on by the fact that we knew if we could get down by 14.30pm we could take the cable car to the town. That meant sleeping in a real hotel and grabbing a beer, so off we went. To cut a long, tiring story shorter, we made it back 3 hours or so later, around 13.30. Packed our bags, exhausted (I mean truly exhausted, falling asleep standing up etc), and headed down the cable car.
2/7 summits are done. A HUGE thanks to Elbrus Tours for getting us to the top (in fact the entire group summited 10/10 people), to Sergei their amazing owner, to Viktor our superstar guide. Next up, South America’s highest mountain, Aconcagua. December 2018? (EDIT 2020** – I FAILED MY ACONCAGUA CLIMB IN 2018, BUT I WENT BACK THE NEXT SEASON AND SUCCEEDED IN TREKKING ACONCAGUA TO THE SUMMIT!).

FAQs on Climbing Mount Elbrus
How much does it cost to climb Mount Elbrus?
It’s similarly priced to Kilimanjaro, roughly speaking with my guys, it’s around 1000Euro.
How high is Mount Elbrus?
It’s 5,642m/18,510 feet
Where is Mount Elbrus?
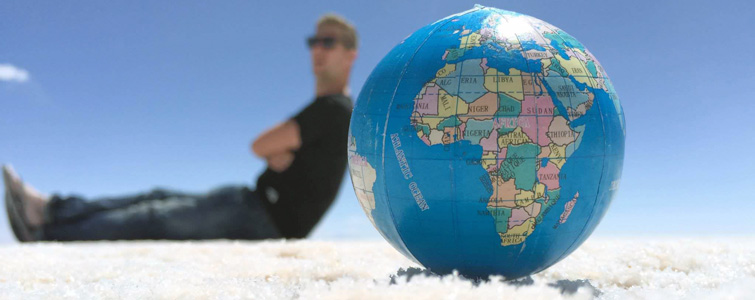
Look at the map in the article above. It’s in Russia, on the border with Georgia.
What gear do you need for Mount Elbrus?
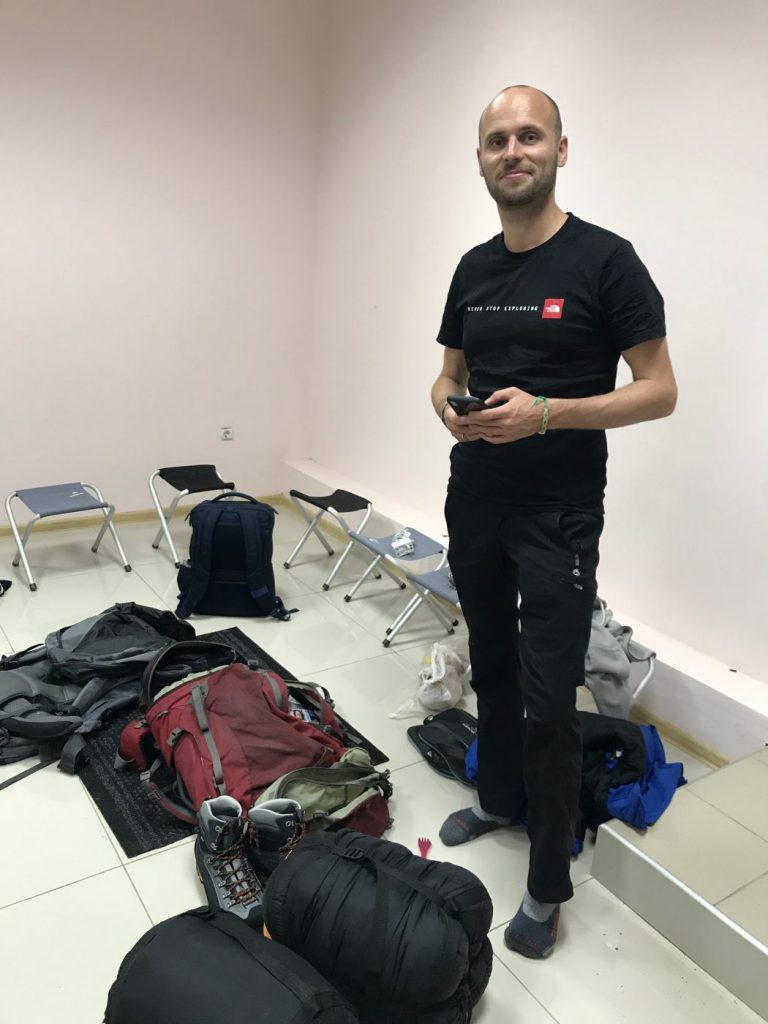
A lot! But your tour operator will allow you to rent from them. Allocate a couple of hundred euros for rental and you should be fine. I, for example, brought base layers, ski-pants, warm coat, hat, gloves. Proper climbing boots, crampons etc are all needed too but are available to rent from your guys.
How long does it take to climb Mount Elbrus?
Normally from Mineralyne Vody airport, up the mountain, down again, and back to Mineralyne Vody airport would be around 8/9 days. If you’re a beast, you could do it in 5 or so.
Do You need to be fit to climb Mount Elbrus?
You can’t be unfit, that’s for sure! What people consider fit is difficult to say. I’d say roughly speaking, if one is able to knock out a 10km run in an hour or so, then the South side is possible. Make that under an hour for the Northside. That’s a horrific way to look at it, but it gives you an idea to contextualize.
What’s the success rate for Climbing Mount Elbrus?
From the Southside of Elbrus at about 85%. On the Northside could be as low as 50%
What’s the death rate for Mount Elbrus?
If you consider 2016, 30 deaths and over 20,000 persons climbing Elbrus officially, the mortality rate is 0.15%
Do I need a guide to climb Mount Elbrus?
There is no legal requirement, but for example, when the weather turned at the summit for me, I would have died 100% without a guide. 0 visibility, no idea where to go. Basically, unless you’re a genuine mountaineer, take a guide.
Remember, never travel without travel insurance! And never overpay for travel insurance!
I use HeyMondo. You get INSTANT quotes. Super cheap, they actually pay out, AND they cover almost everywhere, where most insurance companies don't (even places like Central African Republic etc!). You can sign-up here. PS You even get 5% off if you use MY LINK! You can even sign up if you're already overseas and traveling, pretty cool.
Also, if you want to start a blog...I CAN HELP YOU!
Also, if you want to start a blog, and start to change your life, I'd love to help you! Email me on johnny@onestep4ward.com. In the meantime, check out my super easy blog post on how to start a travel blog in under 30 minutes, here! And if you just want to get cracking, use BlueHost at a discount, through me.
Also, (if you're like me, and awful with tech-stuff) email me and my team can get a blog up and running for you, designed and everything, for $699 - email johnny@onestep4ward.com to get started.
Do you work remotely? Are you a digital nomad/blogger etc? You need to be insured too.
I use SafetyWing for my digital nomad insurance. It covers me while I live overseas. It's just $10 a week, and it's amazing! No upfront fees, you just pay week by week, and you can sign up just for a week if you want, then switch it off and on whenever. You can read my review here, and you can sign-up here!

 As you know, blogging changed my life. I left Ireland broke, with no plan, with just a one-way ticket to Thailand
and no money. Since then, I started a blog, then a digital media company, I've made
more than $1,500,000 USD, bought 4 properties and visited (almost) every country in the world. And I did it all from my laptop as I
travel the world and live my dream. I talk about how I did it, and how you can do it too, in my COMPLETELY FREE
Ebook, all 20,000
words or so. Just finish the process by putting in your email below and I'll mail it right out to you immediately. No spam ever too, I promise!
As you know, blogging changed my life. I left Ireland broke, with no plan, with just a one-way ticket to Thailand
and no money. Since then, I started a blog, then a digital media company, I've made
more than $1,500,000 USD, bought 4 properties and visited (almost) every country in the world. And I did it all from my laptop as I
travel the world and live my dream. I talk about how I did it, and how you can do it too, in my COMPLETELY FREE
Ebook, all 20,000
words or so. Just finish the process by putting in your email below and I'll mail it right out to you immediately. No spam ever too, I promise!